Entering Customer and Carrier Payments via Check Management
EZ Loader's Check Management page allows you to enter single or bulk payment entries into load profiles across your account when you have paid a Carrier and when a Customer has submitted payment(s) to you.
Navigate to Check Management by going to Accounting > Check Management in the left menu.
***NOTE: If your company is utilizing EZ Loader's Quickbooks Integration, this integration can pull Carrier payments and Customer payment receipts into a Load profile automatically. If this feature is activated within your Quickbooks integration, the Check Management section should not be used.
Single Check Entries
The single check entry window allows you to select a desired load profile and enter any type of payment entry. Select "save and close" or "save and new" to continue to enter multiple different entries.


Bulk Payment Entries
The Check Management page includes a template for bulk uploading both Customer Receipts or Carrier Payments.

Selecting one of these options provides a set of instructions to download the template and process your payment information. In the example below, we are going to upload payment Receipts that were received from our Customers.
**NOTE** - The same Excel template is used to upload both Customer Receipts and Carrier Payments. Make sure you upload your Customer Receipts Template by clicking the Customer Receipts button and upload your Carrier Payments template by clicking the Carrier Payments button to prevent upload the wrong template.

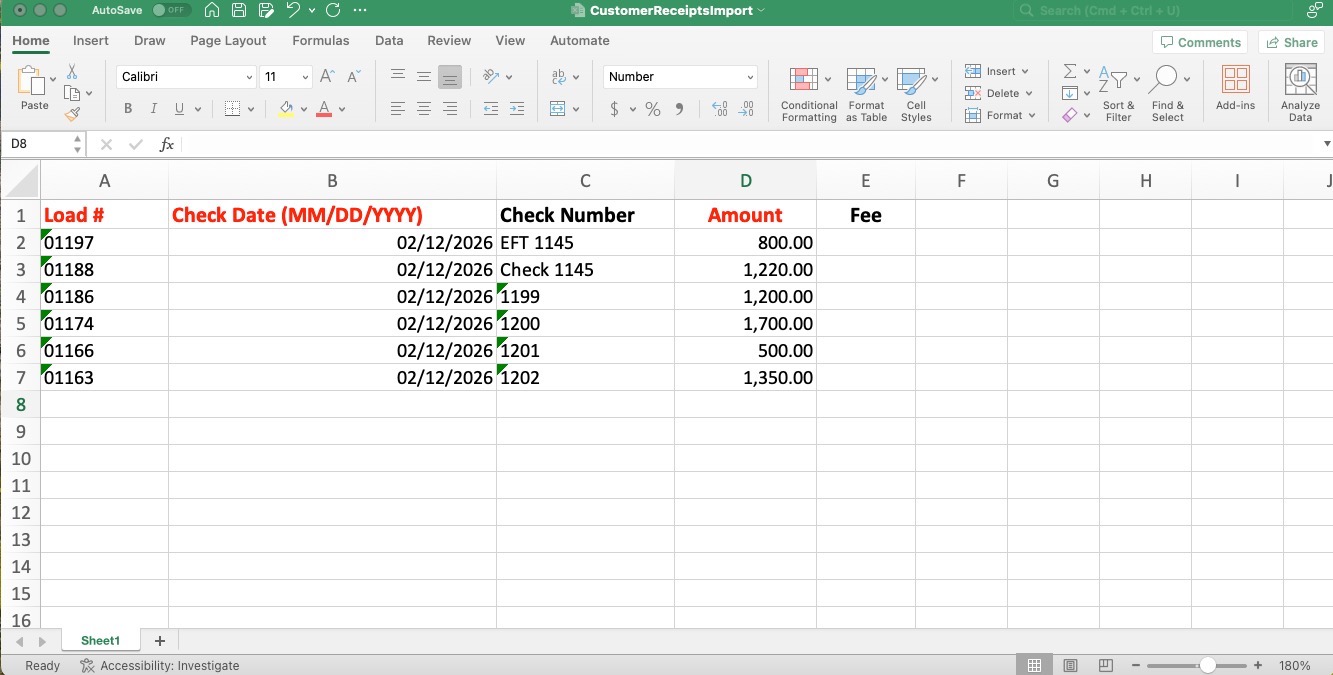
Enter your data into the Excel template that was downloaded. The columns in Red are required.
Column A - Load # - Type in the Load # exactly as it appears within your EZ Load profile
Column B - Check Date (MM/DD/YYYY) - Type in the Date of the "check" (aka Payment) that you made to your Carrier or received from your Customer
Column C - Check Number - This column is optional. Enter any text or numbers here to record for reference
Column D - Amount - Enter the number. No dollar sign is required.
Column E - Fee - This column is optional.
Uploading the template populated with your payment data will take you to a data validation grid. This step will allow you to review and correct or exclude any errors.

All noted errors must be corrected or any entry can be excluded from the upload. Once all entries are corrected or excluded the file can be processed.

After processing, a results screen will display with details of the upload and the option to download a results report.
