1.1 - Logging In & E-Signature Set Up
Step 1: Logging In & E-Signature Set Up
Navigate to www.ezloadertms.com and click “login” at the top right -or- portal.ezloader.app
*** EZ Loader supports the following web browsers: Chrome & Firefox. ***
 Login using the Username & Password you were sent in your welcome email.
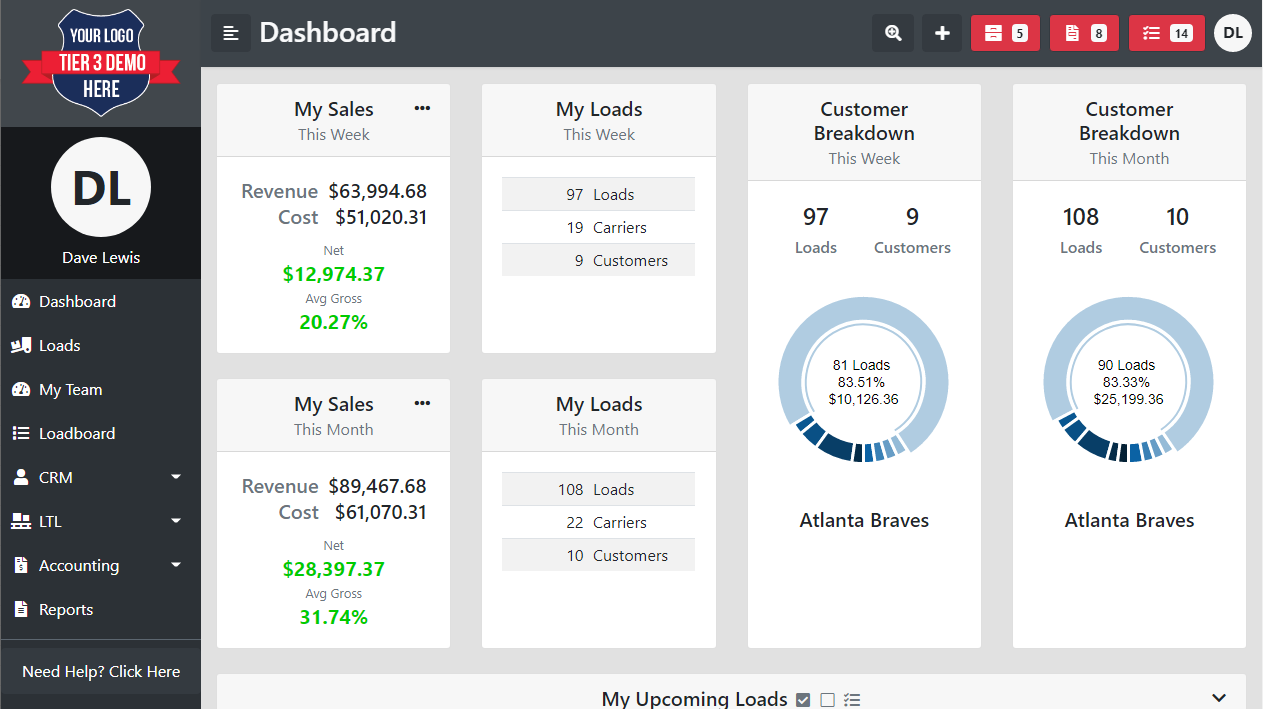
Once logged in you should see the dashboard or load search page... which looks like this:
 Login using the Username & Password you were sent in your welcome email.
Once logged in you should see the dashboard or load search page... which looks like this:

Setting Up Your Signature
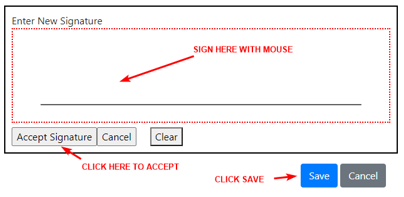
To send rate confirmations, carrier onboarding, or anything else in EZ Loader TMS you must first set up your Digital Signature. This can be found in your profile in the settings section
CLICK YOUR INITIALS IN THE TOP RIGHT CORNER > SETTINGS > PROFILE

CLICK THE EDIT BUTTON ON THE “USER SIGNATURE SECTION”
Step 2: Add Phone Number - Sales Rep Profile
By Default: The name, email, and phone number of whichever sales rep is assigned to the load will appear in the top section of both customer and carrier confirmations.
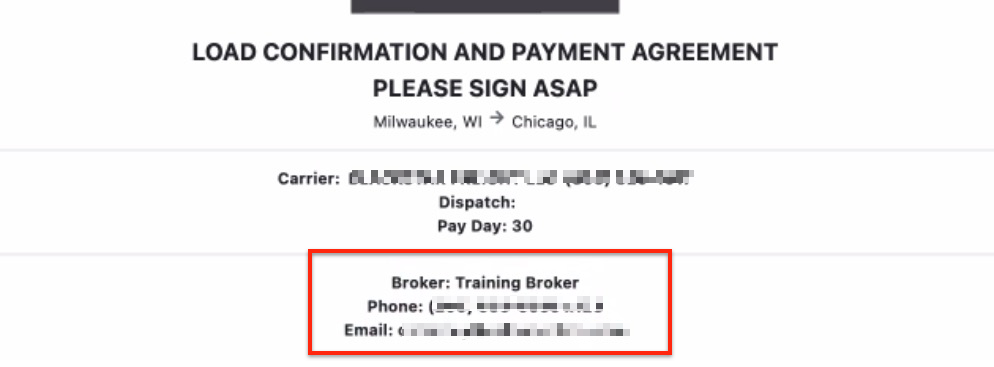
***Please Note: Whichever sales rep is in the "sales rep 1" position will be the contact information that appears on the confirmations.
To update any of the above information navigate to settings > sales reps > search for your profile > edit
If you want to change who's contact information appears on rate cons, see article below:
Click Here for Help on Customizing Rate Con Contact Info

Step 3: Custom Load List Colors
In EZ Loader you have the ability to customize the colors of your loads in your loads list based on their status.

To set this up click the Top Right Circle > Settings > Profile > User Load Status Colors.

To send rate confirmations, carrier onboarding, or anything else in EZ Loader TMS you must first set up your Digital Signature. This can be found in your profile in the settings section
CLICK YOUR INITIALS IN THE TOP RIGHT CORNER > SETTINGS > PROFILE

CLICK THE EDIT BUTTON ON THE “USER SIGNATURE SECTION”

Step 2: Add Phone Number - Sales Rep Profile
By Default: The name, email, and phone number of whichever sales rep is assigned to the load will appear in the top section of both customer and carrier confirmations.

***Please Note: Whichever sales rep is in the "sales rep 1" position will be the contact information that appears on the confirmations.
To update any of the above information navigate to settings > sales reps > search for your profile > edit
If you want to change who's contact information appears on rate cons, see article below:
Click Here for Help on Customizing Rate Con Contact Info

Step 3: Custom Load List Colors
In EZ Loader you have the ability to customize the colors of your loads in your loads list based on their status.

